

How to Change Shopify Inventory Location to a 3rd Party
You can’t convert a Shopify location into a 3PL one. Here’s how to change your inventory location to a 3rd party and what breaks after.

Handing your stock to a 3PL is a warehouse decision. Telling Shopify about it is a
separate job, and the order matters, get it wrong and you will either oversell for a
week or lose the ability to count what you own.
The short version: you don’t convert an existing location into a third-party one.
You create or connect a new location the 3PL controls, move the stock into it, then
deactivate the old one. Shopify has no “make this location a 3PL” switch.
The part almost nobody covers is what happens next. Once a 3PL owns a location, that
stock stops being yours to edit, and anything else you use for purchasing or counting
has to be told who is in charge. Skip that and your purchase orders quietly stop
working. We’ll get to it.
First, work out which kind of 3rd-party location you’re creating
This fork decides everything else, and it’s the thing the Shopify docs assume you
already know.
Type 1 - a fulfillment service location. Your 3PL has a Shopify app. You install it
and the app creates its own location automatically. ShipBob, ShipHero, Amazon MCF and
Most established 3PLs work this way.
Type 2 - a plain location you happen to call “3PL”. Your 3PL has no app, or you’re
not connecting it yet. You add a normal Shopify location, name it after the warehouse,
and keep the numbers right yourself.
They behave very differently:
Fulfillment service location | Plain location | |
Who creates it | The app, on install | You, in Settings |
Edit the address? | No | Yes |
Edit the stock numbers? | No, the app owns them | Yes |
Delete it? | No. Remove the app instead | Yes, deactivate it |
Counts toward your plan’s location limit? | No | Yes |
That last row matters more than it looks. Shopify caps locations by plan 2 on
Starter, 10 on Basic, Grow and Advanced, 200 on Plus. Fulfillment service locations
don’t count against the cap, and neither do deactivated ones. If you’re near the
ceiling, connecting a 3PL’s app costs you nothing in location headroom.
Route 1: Your 3PL has a Shopify app
Install the 3PL’s app from the Shopify App Store and finish its setup.
Check Settings → Locations. The app’s location should now be listed. You didn’t
create it and you can’t rename it.Move your stock into it (see below).
Deactivate the location the stock used to live in, if you’ve stopped shipping from
there.
One thing worth knowing: as of September 2026, Shopify has been migrating all fulfillment
services onto multi-location inventory since February 2026, so the same product can now be stocked at your own location and at the 3PL simultaneously, each with its own count. Useful if you’re
splitting fulfillment, confusing if you assumed handing stock to a 3PL removes it from
your other locations. It doesn’t. You have to move it.
Route 2: Your 3PL has no app
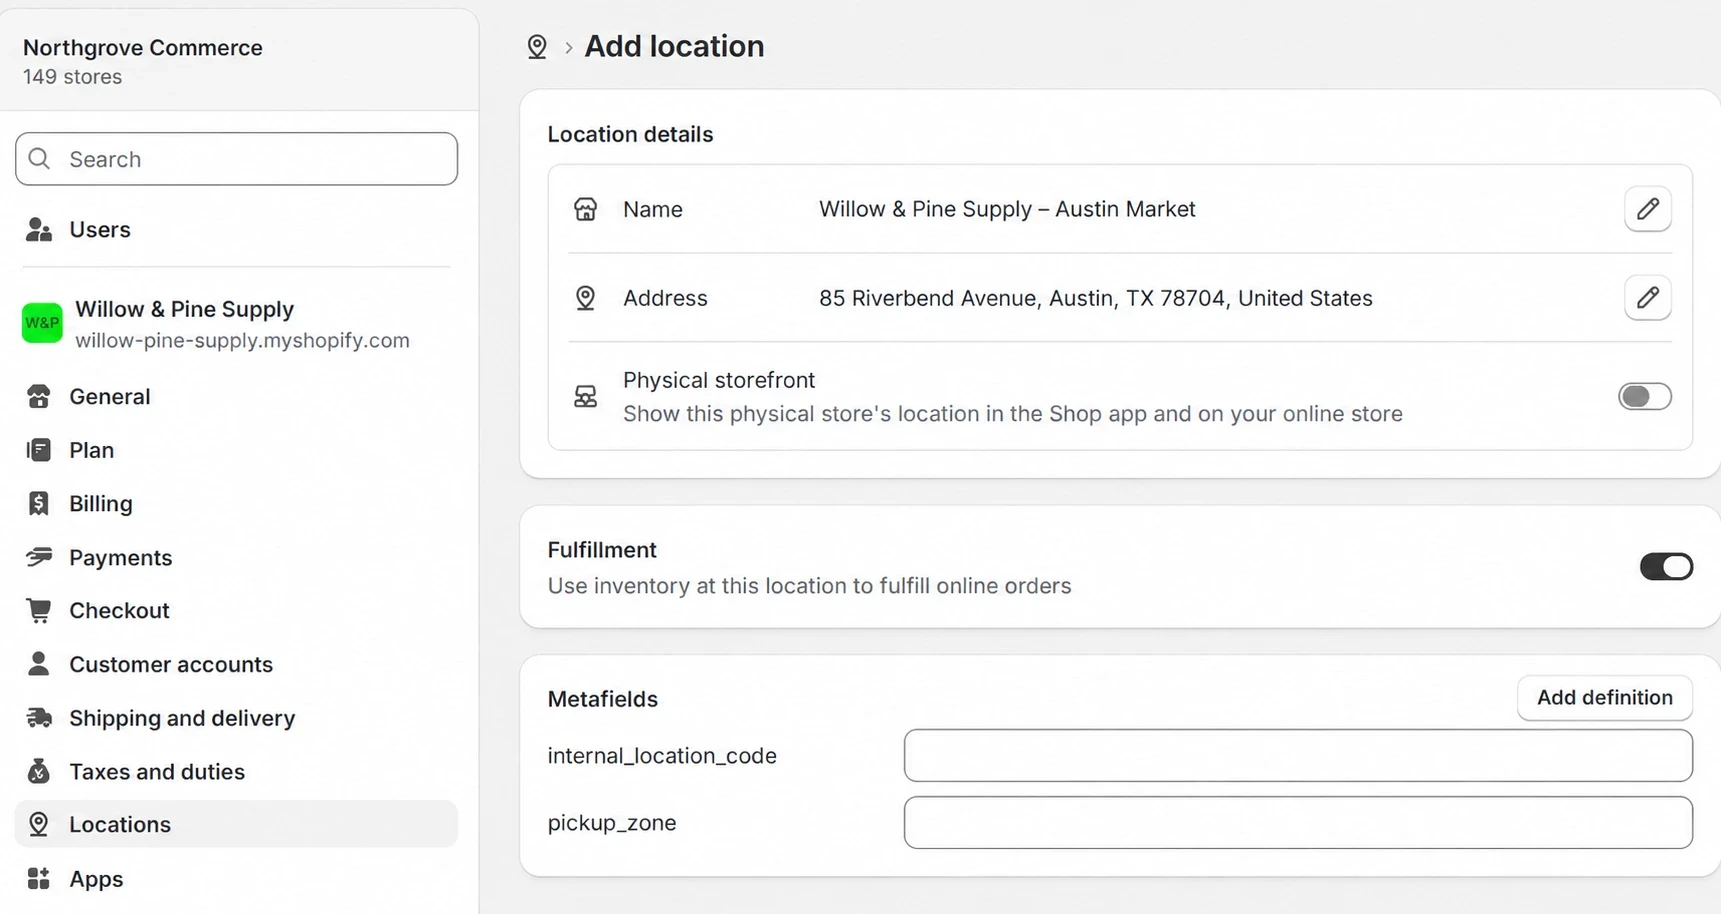
Go to Settings → Locations.
Click Add location.
Enter the name and warehouse address. Name it something a human will recognize on an order six months from now Eastway 3PL Reno, not Location 3.
Leave Inventory at this location is available to fulfill online orders on, unless
you have a reason not to.Save.
You now own this location in Shopify’s eyes, which means you’re responsible for its
numbers. Nothing updates them for you.
Moving the stock across
Creating a location doesn’t move anything. Three ways to do it, depending on scale:
A transfer is correct when goods are physically moving. Create it from Products →
Transfers, ship it, receive it on arrival. Counts follow the goods and you keep a
record of what left and what showed up, which you’ll want when the first count
disagrees. We cover the full transfer flow, including receiving separately.
A direct adjustment is for when the stock is already at the 3PL and you’re just
correcting Shopify to match reality. Edit the quantity at each location. Faster, but no
paper trail, so write down why you did it.
A CSV import is the answer for more than a few dozen SKUs, and it’s what most people
end up wanting. Export inventory from one location or all locations, then import a
file with a Location column, it must match your Shopify location name exactly,
including case plus Handle, your option value columns, and On hand (current) and
On hand (new). Each variant needs a separate row per location. Files cap at 15 MB.
Include both the current and new quantity columns. When both are present Shopify
compares what it expects against what’s actually there before writing, which stops a
stale export from silently overwriting a week of sales. Note that Shopify’s CSV
documentation covers standard locations; it doesn’t confirm the same works for
fulfillment service locations, and generally those are the app’s to write, not yours.
Do all of this before you deactivate anything. Shopify won’t let you unstock a product
from a location with unfulfilled orders or active transfers against it.
Deactivating the old location
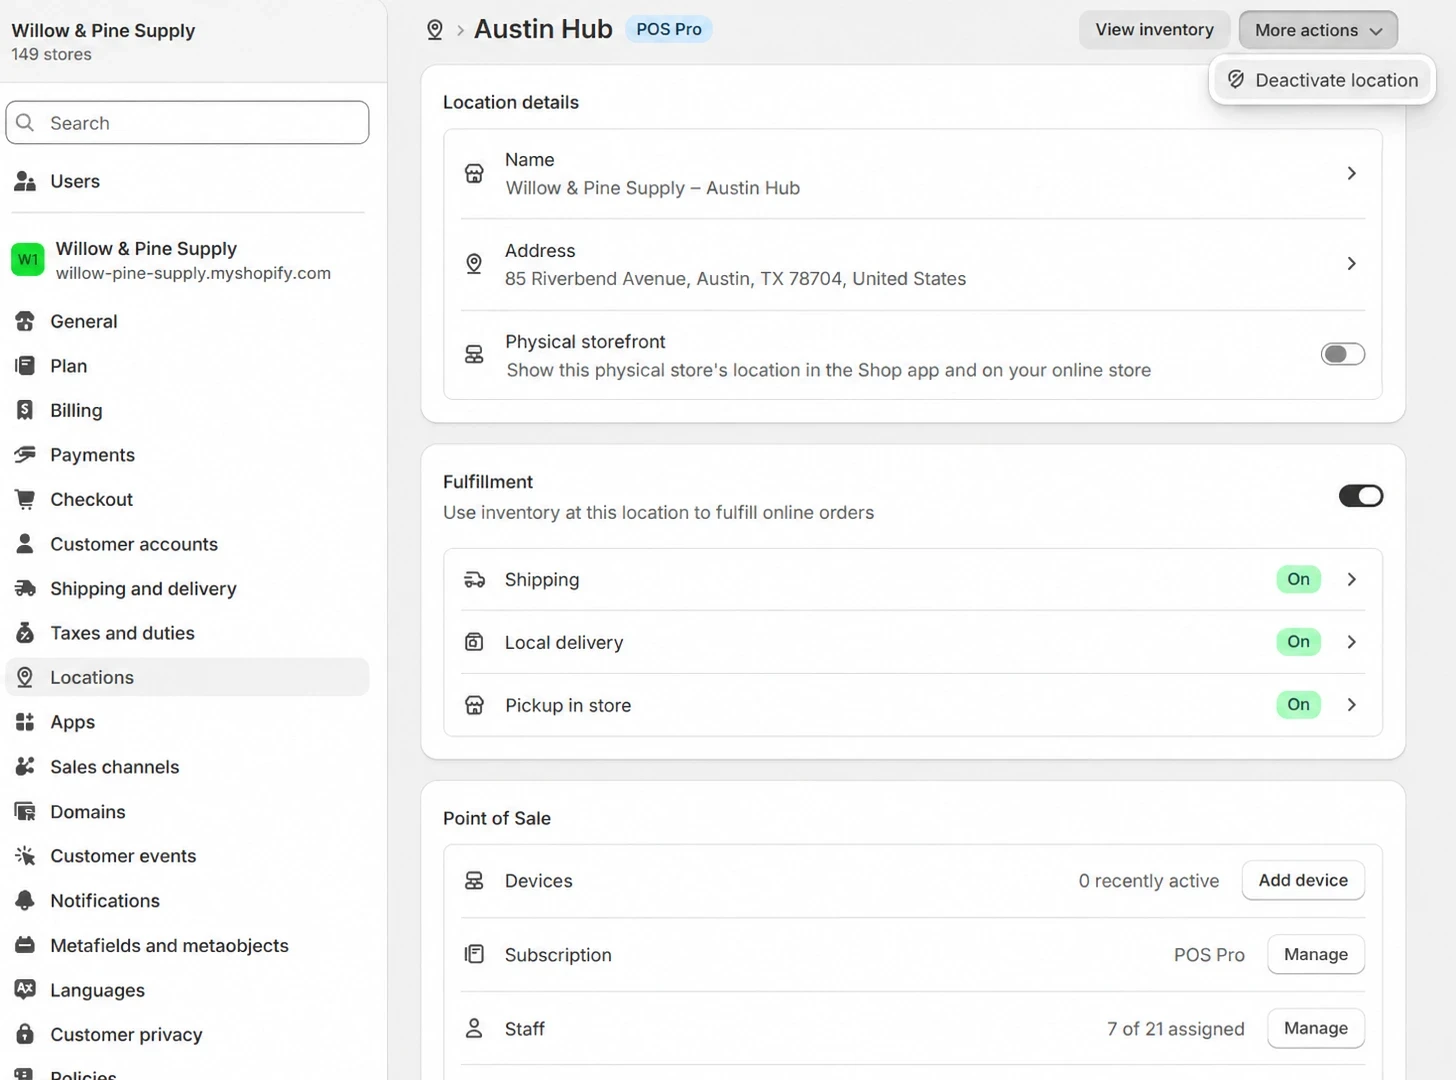
Settings → Locations → pick the location → Deactivate location. If inventory is
sitting there, Shopify asks you to reassign it to another active location first, then
you confirm.
Deactivating does not change your inventory quantities. It stops the location being
used for new orders. You can still view and transfer stock at a deactivated location
afterwards, so this is reversible, and less frightening than it sounds.
Shopify blocks deactivation if:
there are pending unfulfilled orders or transfers at that location
it’s your default location - change the default first
it has a POS Pro subscription - downgrade that first
it’s an app or third-party location - remove the app instead; you can’t deactivate it
an inventory migration is in progress - wait 24 to 48 hours
you’re on Shopify Plus without sufficient organization permissions
Most “I can’t deactivate this location” problems are the default-location one. It’s also
the most common reason people end up posting on the Shopify community forums about
this, so check it first.
What breaks afterwards
Here’s the part the setup guides skip, and the reason people are back on the forums a
fortnight later.
You no longer own that count. At a fulfillment service location the app writes the
numbers and the field is not yours to edit. If your 3PL miscounts, you fix it with the
3PL, not in Shopify. Merchants usually discover this the first time they try to correct
a number and find they can’t.
Your other tools need to be told. This is the expensive one, and 3PL inventory
management doesn’t end at Shopify’s location screen. Any inventory, purchasing or
forecasting app sitting on top of Shopify has to know whether it owns stock levels or
whether something else does and most ask once, during setup, in a single screen.
Answer “something else owns my stock” and the tool switches to read-only. For the 3PL’s
own stock, that is usually correct. The catch is scope: check whether that setting
applies to the one location your 3PL runs, or to the whole connected store. If it is
store-wide, the symptoms will not point at the cause:
suppliers don’t appear when you try to raise a purchase order
the purchase order screen is empty, or won’t let you add products
stocktakes have nothing to count
everything looks connected, so it reads as a bug rather than a setting
None of that reads as a sync setting, which is why it usually gets reported as a bug. If
your Shopify purchase order workflow empties
out overnight and nothing else about your catalogue changed, check this setting before
you check anything else. The stock sync is probably working perfectly, the tool is doing
exactly what it was told to do.
Watch out if your setup is mixed. Plenty of retailers keep a shop or main warehouse
in-house and use a 3PL for overflow or for one region. Where ownership is modelled at the
store level rather than per location, one switch decides the behaviour for everything you
Have, so flipping it to read-only because some of your stock sits at a 3PL takes your
own warehouses read-only too. Find that setting and check its scope before you choose.
A checklist you can work down
Before you start:
Know whether your 3PL has a Shopify app
Check your plan’s location limit and how many you’re using
Fulfil or clear open orders at the location you’re emptying
Change your default location if you’re about to deactivate the current default
Doing it:
Create or connect the 3PL location
Move the stock transfer, adjustment, or CSV
Confirm the numbers at both locations before going further
Deactivate the old location
Afterwards:
Place one test order and confirm it routes to the right location
Check every other app that touches inventory, and confirm which one owns stock
Raise one purchase order and run a quick stocktake, just to confirm they still work
That last line takes two minutes and catches the problem above before it costs you a
fortnight.
Frequently Asked Questions
Can I convert an existing Shopify location into a 3PL location?
No. A fulfillment service location is created by the 3PL’s app when you install it. You
move stock into it and deactivate the old location instead.
Will deactivating a location delete my inventory?
No. Deactivating doesn’t change quantities. You can still view and transfer stock at a
deactivated location, and it stops counting toward your plan’s location limit.
Why can’t I delete my 3PL’s location?
App and fulfillment-service locations can’t be edited or deleted by the merchant.
Remove the app and the location goes with it.
Do 3PL locations count toward my Shopify location limit?
No. Neither fulfillment service locations nor deactivated locations count.
Can I keep stock at my own warehouse and at the 3PL at the same time?
Yes. Multi-managed inventory tracks each location’s count separately. Just remember the
stock doesn’t move between them on its own.
My purchase orders stopped working after I set up a 3PL. Why?
Almost certainly your purchasing tool was told a third party owns inventory, and it has
gone read-only. Look for a source-of-truth or sync-method setting and check whether it
applies per location or to the whole store.
Where Channel Bay fits
Channel Bay reduces this to one question at setup, and deliberately does not ask you to
describe your fulfilment model. On the inventory sync step you choose between:
Bi-Directional - “Channel Bay syncs data from and pushes inventory updates back
to your Shopify store.” Choose this if Channel Bay is running your purchasing and
counting.Fetch-Only - “Channel Bay only fetches updates from your Shopify store. We will
not push any inventory updates to your store.” Correct when something else owns your
Stock, but purchase orders and stocktakes then have nothing to write to.
The choice is restated on the review screen before you finish, with an edit control next
to it, so you see it twice before anything syncs. It applies to the whole connected
store rather than to a single location, which is the thing to weigh if only part of your
stock sits at a 3PL.
It is also reversible. If you chose Fetch-Only and your purchase orders have gone
quiet, you don’t need to reinstall anything: open Integrations → View Linked Stores,
click the store, and open the Warehouse Mapping tab. The panel shows your current
Stock Sync Method, and when that reads Third Party App a Switch to Channel Bay button sits beside it. Your data is still there.
And if you’re moving to a 3PL while also migrating off Shopify Stocky, do the Stocky import first, purchase history and supplier links are easier to bring across while both systems still have their data.

